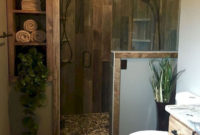
Ranges of freestanding, solid wood bathroom furniture, such as those produced by Mito, give a bathroom a look of high end luxury that’s hard to beat. With a variety of vanity units, washstands, and cabinets or storage units to choose from, you can combine individual pieces to create a coordinated look that still floats freely in your bathroom.
As you’ll learn when you come to install your new purchases, however, freestanding doesn’t always mean ‘not fixed down’. Certain bathroom furniture is designed to carry some form of sanitaryware, and will therefore also house water supply pipes and waste pipes.
A vanity unit or washstand, for example, will hold a basin that will be plumbed into your mains water supply and sewage system. It needs to be fixed down in some way, or any accidental knocks it receives will sooner or later cause damage to the pipework within – which, in return, could rapidly cause a lot of damage to your bathroom.
Other items, such as storage units, don’t have to be fixed in place. This leaves you with the freedom to rearrange them as often as you please for a new bathroom look each time; it also means that ‘installation’ becomes an invalid concept.
We’ll just deal here, then, with installing your new ‘freestanding’ solid wood vanity unit or washstand.
The first thing you will need to do is to look at where your water supply pipes and waste pipe enter your bathroom. They could come in through the wall, or up from the floor. Measure exactly where the pipes are in relation to the place you plan to fix your vanity unit or washstand.
Then measure the vanity unit, and cut a hole in either the base or the back (whichever is relevant to your pipe layout) to allow the vanity unit or washstand to slot over the pipes, so that all your pipework will be concealed by your bathroom furniture. Take care when measuring: precision is important to avoid errors.
Your vanity unit should then be fixed in place. Refer to your manufacturer’s fitting instructions, as specific guidance may have been included about how best to do this. Generally, screwing the item to the wall or floor should be sufficient. Once again, take care when measuring for your drill holes – both that you get them in the right place first time, and that you don’t hit any electric cables in your walls.
Generally, electric cables in walls run in a vertical line from the floor up to a plug socket and from the ceiling down to a light switch, so avoid these areas. You could invest in a sensor to alert you to the presence of wires in walls, which could also be useful for future DIY projects.
Make sure you drill carefully, especially into tile as this is a surface that can crack easily if you drill too enthusiastically. There will be a slight gap between the wall and the back of the vanity unit; run some waterproof sealant along here to prevent water ingress once your new bathroom is in use.
When plumbing in your basin, use the correct tools and supplies for the job, follow the manufacturer’s instructions, and make sure your joints are tightened sufficiently to prevent dripping or leaking. Call in a professional to take on plumbing work if you’re not a confident or regular DIYer – it’s best to get a job done properly at the outset than have to rectify problems later on, especially where mains water is concerned.


